

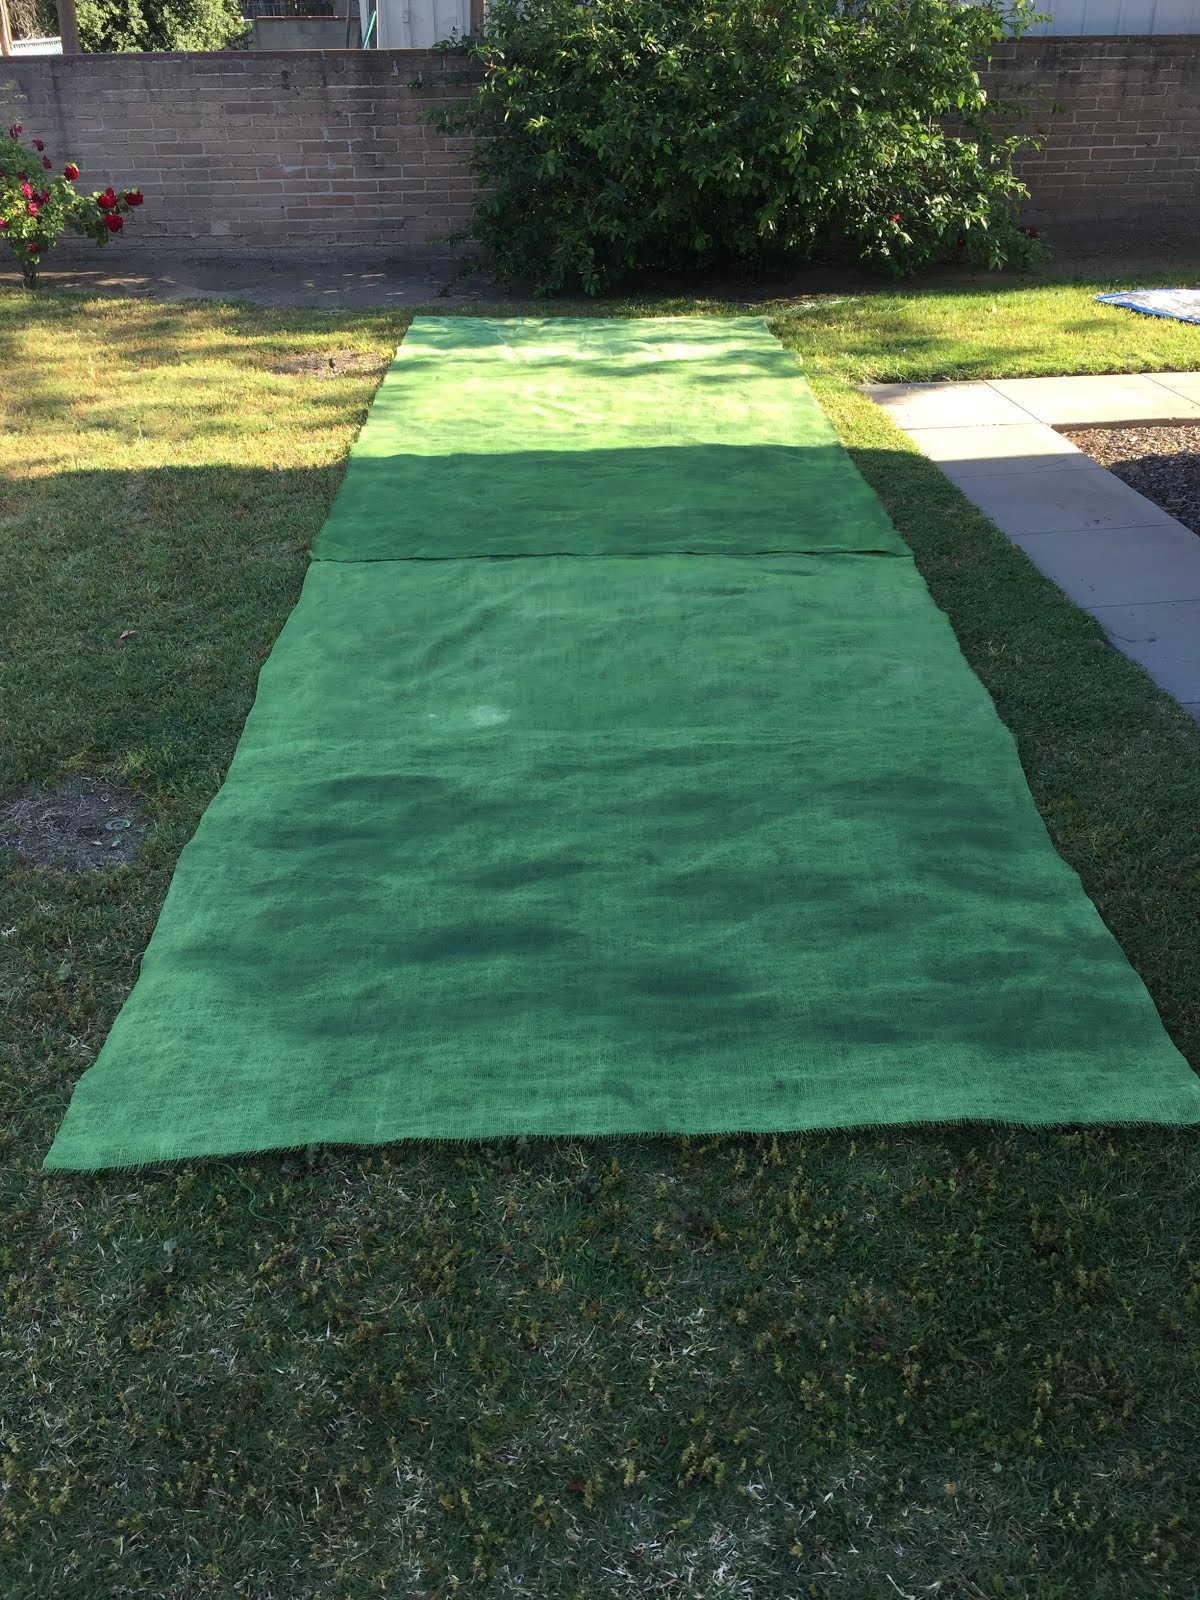
I wanted to follow up on my burlap mat experiment quickly, before I forgot exactly how I did it. I should have expected the difficulties that I ended up encountering when I quintupled the size of the battle field, but I think I overcame them. Also, the lighting quality really varies from picture to picture. I'll be doing some proper ones later on, in more ideal lighting situations. The final product looks like this, 20' x 6':

Total cost was $35 for paint and material. At my scale 20' is 10km or about 6 miles. 6' width is 3km. No more setting up in canister range! For historical comparison a straight line from Aderklaa to Markgrafneusiedl is 4.37 miles. Borodin Village to Utitsa is right around 3 miles. I'm not too familiar with the battle but with some adjustments to the (generic) country road network you could probably do Leipzig as well, all at the battalion level.
My basic scale to which my 3mm figs are based is 60mm=100m, 1'=500m. My French infantry battalions at field strength are 60mm in frontage at a 6:1 footprint ratio and a 9:1 figure ratio (I only do 2 ranks, thus the disparity!). This is a generic size but it's reasonable enough that I can assume it averages out over the distances we're seeing here. If I were to maximize my 3mm battalions to 1:1, you would need a table 6 X what you see here to contain the same battle field!
So basically, plenty of space to game in here. I've made a wall-to-wall PROOF miniatures table!
3mm is king!!!!
{A-hem....}
I asked around for advice on TMP before going with the 6' depth. It seems this is really the maximum depth one can easily use at a convention, without moving tables around or some other such novelty.
Ok, enough talk. Onto the how-to!
Materials wise this project was pretty cheap. I caught Joannes fabric on a 50% off sale and was able to get the additional 8 yards of burlap for only $12. The paints were another $25, including two of those $1 brushes they have there, one big one for the green and a small one for the roads. Color wise I used Apple and Shamrock green from the generic craft paint aisle at Michaels. As it turns out Shamrock wasn't the same green as in the original panel- that was made using Apple and Grass Green. Well, that small difference caused me to have to back track and do some shading. All will be explained below. It worked out in the end I think..
Ok, so, here we go. First, get your work space ready. It's going to get (very) messy so try to set-up with clean-up in mind.

If you're also in California this is a good time to check your garage for black widows. I found a web just beneath the step down into the garage. Woof. In the last two years I've killed at least fifty of them and maybe over one hundred. I stopped counting at some point. The things are everywhere.
The mat on the floor is my original mat from the previous post. It was my model, and I ended up having to adjust it a bit because the greens I bought the other day didn't quite match it. The trick here is to be flexible.

Woof. That's not quite the same! It's ok though, as will be seen...
Paint wise, you want to use a measuring cup of some sort so you know exactly how much water and what proportions of the greens (and yellows if you want) are going into your mix. You want to stay as consistent as possible from mat to mat. I used 50/50 Apple and Shamrock then thinned that out to 2:1 water/paint. At several points I used 3:1 and it worked nicely. Thinner, generally, is better here. I did this entire project with 6 x 16oz tubes of paint, three of each green.

The two on the right are pretty close, and the other two are not. I was able to use some watered down shamrock to bring them all back together. I basically gave the map a shamrock wash until it came together. Crude but effective.

Here are the five mats side by side, still with the rough edges. Next here it is trimmed off.
The trick here (and the trick to keeping your burlap from turning into strings!) is to cut exactly down the space between the strings. The latex really helps seal the material together as well. I'm also going to take some Extra Tacky Glue and seal every single edge of these mats to make them as tough as I possibly can. I'm not too worried about it getting stringy but I want to make extra sure.
Next, I add in the roads:

I had to zip my address off the recycling can! They're free from the city but people will steal them anyway... Anyways, here is the roadway, and the basically finished project. All the mats overlap going the same direction, away from the viewer in this shot. The effect worked out pretty well. You can also see how I was able to even out the greens a bit to get a more unified final product. It isn't perfect in that regard but I think the slight shift I ended up with works in it's own way.
Here's B-Dubz ("Black and White Cat") our adopted alleycat checking it out. He's actually been around the entire time, out of frame.

The dirt patch used to have plants but they all died in the drought this year... :(
The roughness at the bottom of the picture (in front of B-Dubz) are just loose tassels that I can snip off in a few seconds. I overlooked them in the rush to get cleaned up before dark. I need to get them off of there before they lead to unraveling!
So, all in all it was a cheap, fun, fast project. It only took me three hours from set-up to clean-up. And now I have the basis for a properly memorable convention game with tens of thousands of figs. Finishing those guys off will be the next big step... but that'll be a post for another time!


0 Yorumlar